How to Make a Family Emergency Binder (Step by Step)
If you have ever spent twenty minutes hunting for a passport, an insurance policy number, or the name of a child’s medication, you already understand why a family emergency binder is useful. It is simply one place where the information your household would need in a hurry is written down, organized, and easy to grab.
I like to think of it less as “disaster gear” and more as household paperwork that finally has a home. Below is the exact process I recommend for making a family emergency binder, from choosing the binder itself to keeping it up to date once a year.
Why a Paper Binder Still Makes Sense
Phones are wonderful until the battery dies, the network is overloaded, or the phone is the thing that got lost. Official preparedness guidance repeatedly points to keeping key information somewhere other than your phone. Ready.gov’s low and no cost preparedness tips suggest making sure you “store important phone numbers somewhere besides just your cell phone,” and the UK government’s Prepare guidance recommends writing important phone numbers on paper and storing them somewhere easy to find in a power cut.
A binder does that job well. It is also easy to hand to a babysitter, a relative who is staying over, or a neighbor helping out.
Step 1: Gather Your Supplies
You do not need anything fancy:
- A sturdy ring binder (one that closes fully is nice)
- Tab dividers, one per section
- Clear sheet protectors for originals you want to keep visible, or for copies
- A zip pouch that clips into the rings, for a USB drive, spare key, or a little cash
- A waterproof bag or container to store the binder in
Ready.gov notes that important family documents can be kept “saved electronically or in a waterproof, portable container” (Build A Kit). A binder inside a waterproof bag fits that description nicely.
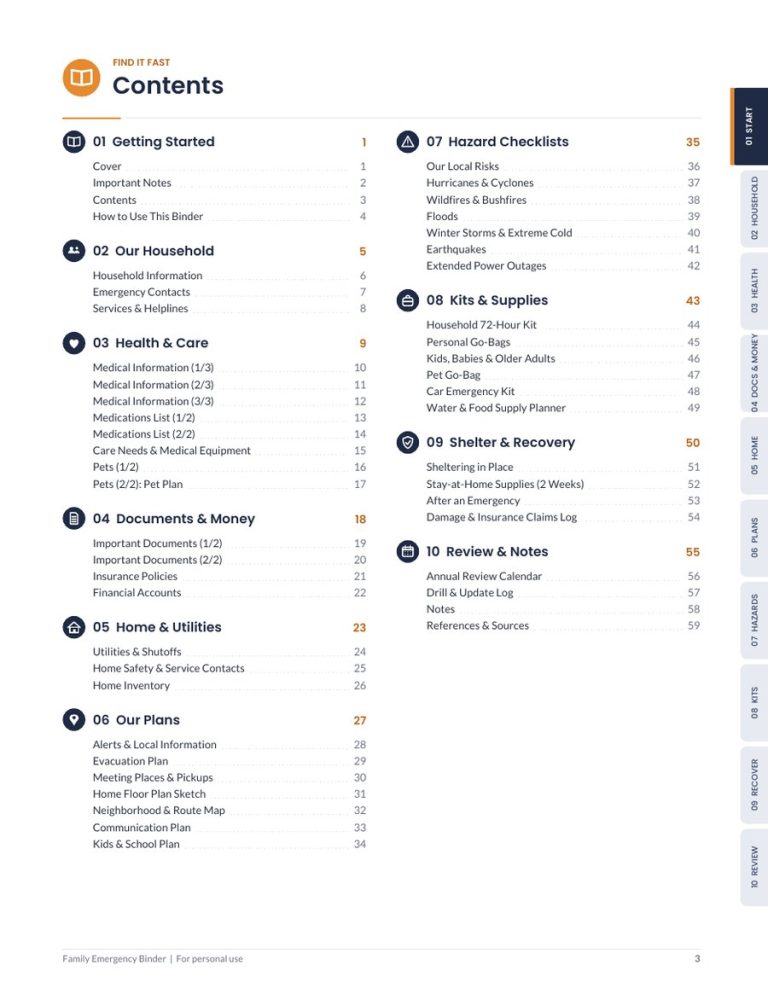
Step 2: Decide on Your Sections
Here is the section list I use. Adjust it to your household.
- Household overview – names, dates of birth, home address, a recent photo of each person
- Emergency contacts – family, an out-of-area contact, neighbors, school, work
- Medical information – conditions, allergies, medications and doses, doctors, pharmacy
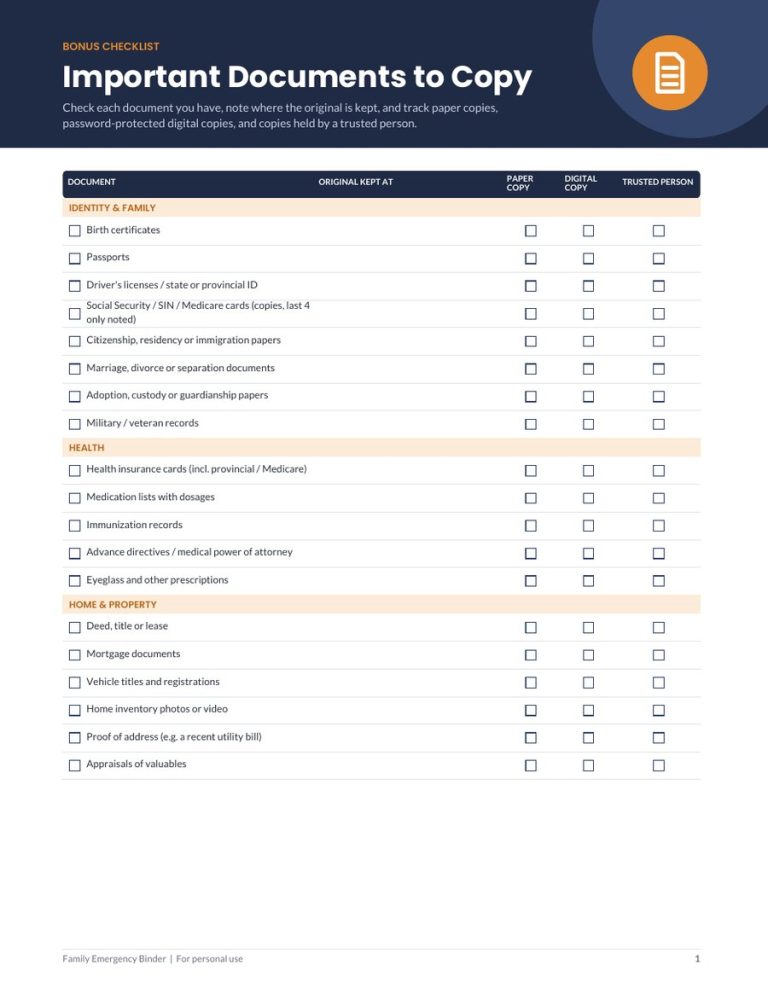
- Identification copies – passports, ID cards, birth certificates
- Insurance – home or renters, health, life, vehicle; policy numbers and claim phone numbers
- Financial – bank and card contact numbers (not passwords), income sources, regular bills
- Property – deed or lease, vehicle details, a home inventory
- Pets – vaccination records, microchip number, vet contact, a photo
- Emergency plan – meeting places, evacuation routes, utility shut-off notes
- Notes and updates log – when you last reviewed the binder
If you want detail on what goes behind each tab, I wrote a full breakdown in what documents to keep in an emergency binder.
Step 3: Fill In the Contact and Medical Pages First
These are the pages most likely to be used, so I always start here. The American Red Cross survival kit list includes “family and emergency contact information” and copies of personal documents such as a medication list and pertinent medical information.
For each person, write down:
- Full name and date of birth
- Blood type, if known
- Allergies (medication, food, insect)
- Current medications with dose and schedule
- Doctor and pharmacy names and phone numbers
- Health insurance member number
The Red Cross also recommends choosing an out-of-area emergency contact, since it may be easier to text or call long distance if local lines are overloaded. Put that person at the top of your contact page.
Step 4: Add Copies of Key Documents
Make photocopies or printouts of identification, insurance cards, and other important papers. Ready.gov’s financial preparedness page explains why each matters. For example, it lists photo ID to prove identity of household members and insurance policies to help re-establish financial accounts.
A few practical rules I follow:
- Copies in the binder, originals stored safely. Keep irreplaceable originals somewhere secure, and put clear copies in the binder.
- Black out what you do not need. If a full account number is not necessary for a phone call, consider writing only the last few digits.
- No passwords. A binder can be lost or seen by others. Keep passwords in a proper password manager instead.
Step 5: Write Down Your Emergency Plan
Your binder is the natural place for your household plan. Ready.gov’s Make A Plan page suggests discussing how you will receive alerts, your shelter plan, your evacuation route, your communication plan, and whether your kit needs updating.
On one page, write:
- Meeting place near home (for a sudden event like a fire)
- Meeting place outside the neighborhood (if you cannot return home)
- Evacuation destinations in more than one direction
- Who picks up the kids and from where
- Where the utility shut-offs are and who knows how to use them
The Red Cross suggests choosing two places to meet: right outside your home and outside your neighborhood. For households with children, pets, or older relatives, my guide to a family emergency plan for kids, pets and elderly relatives goes deeper.
Step 6: Decide Where the Binder Lives
The best location is one that everyone in the household knows and can reach quickly. Some ideas:
- A shelf near the main exit, inside a waterproof bag
- Next to your home emergency kit
- A fire-resistant document box (check that it opens easily)
Ready.gov also suggests storing important documents in a flood-safe place, such as a high shelf or upper floor, in resealable water-tight plastic bags (low and no cost preparedness).
Tell every adult and older child where it is. A binder only helps if people know it exists.
Step 7: Make a Digital Backup
A paper binder and a digital copy cover each other’s weak spots. Ready.gov’s financial preparedness page suggests storing important documents in a safety deposit box, on an external drive, or in the cloud.
My approach:
- Scan each page once it is complete
- Store the scans in an encrypted folder or a secure cloud account
- Share access with one trusted adult outside the home, if appropriate
Step 8: Set a Review Date
Information goes stale quietly. Phone numbers change, prescriptions change, kids grow. Ready.gov recommends you “re-think your needs every year” for your kit (Build A Kit), and I apply the same rhythm to the binder.
Pick a date you will remember, like the start of a new year or a birthday, and run through this quick check:
- ☐ Contacts still correct?
- ☐ Medications and doses current?
- ☐ Insurance policies renewed and numbers updated?
- ☐ New documents to copy (new passport, new car)?
- ☐ Meeting places still make sense?
- ☐ Digital backup refreshed?
Write the review date on the updates log page.
A Shortcut If You Would Rather Not Start From Scratch
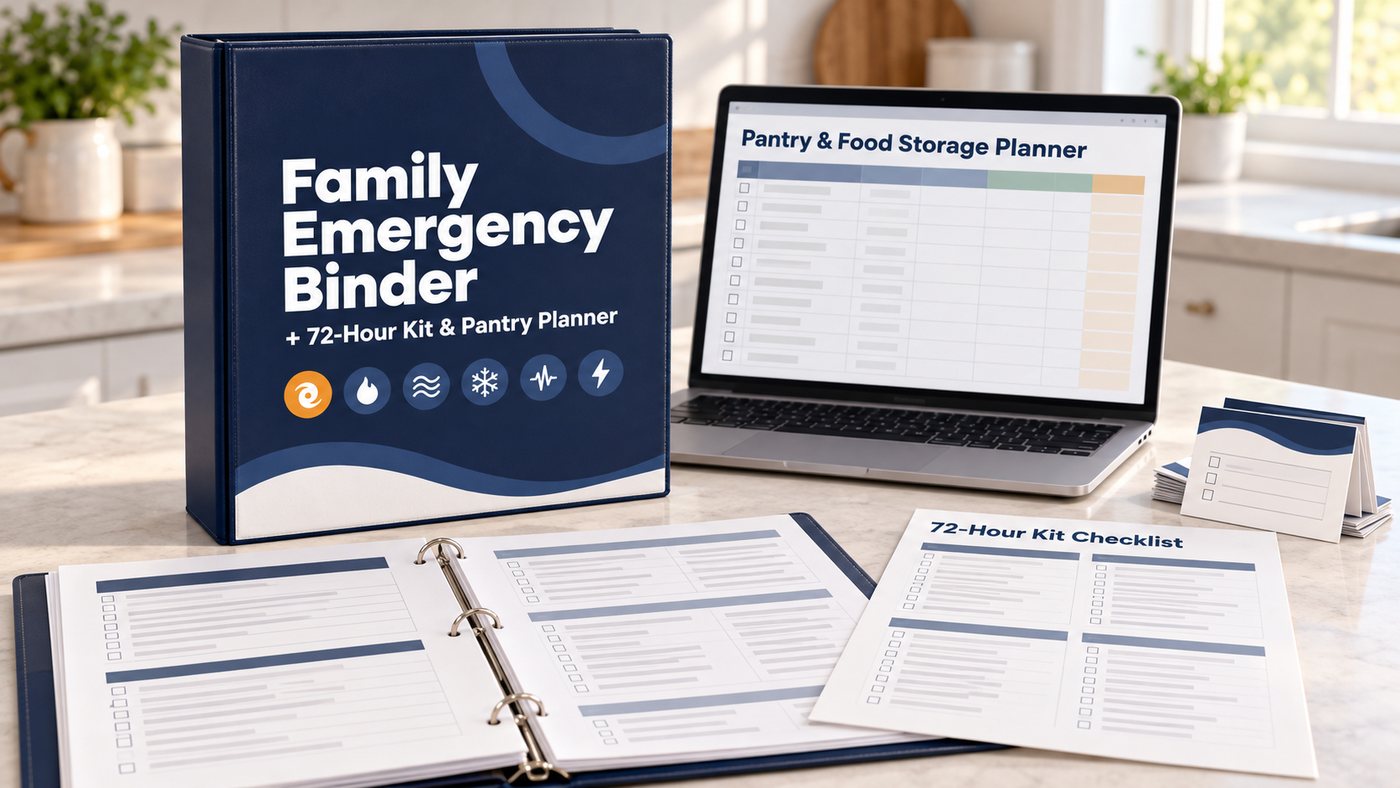
Building your own pages from blank paper works perfectly well. If you would prefer a ready-made structure, I put together the Family Emergency Binder + 72-Hour Kit & Pantry Planner. The main binder is a 59-page fillable PDF in 10 tabbed sections (Start, Household, Health, Docs & Money, Home, Plans, Hazards, Kits, Recover and Review), and you can type into it on screen or print it and fill it in by hand. I also included a one-page Quick Start for the essentials, a 12-month review calendar in the Review section, a 72-hour kit checklist, fold-over wallet cards, a documents-to-copy checklist and a pantry spreadsheet for Excel or Google Sheets. You can see what is inside here.
FAQ
How long does it take to make a family emergency binder?
The setup is usually an afternoon. Gathering documents you have misplaced can take longer, so I suggest doing the contact and medical pages first and adding the rest over a few weeks.
Should I keep original documents in the binder?
I keep copies in the binder and originals stored securely elsewhere. That way, if the binder is lost or damaged, the originals are not lost with it.
Is a digital-only emergency binder enough?
A digital copy is very useful, but official guidance suggests keeping important numbers somewhere other than your phone. I recommend having both paper and digital.
What if I live alone?
A binder is just as helpful for one person. It gives a neighbor, relative, or emergency responder the information they would need if you cannot provide it yourself.
Conclusion
Making a family emergency binder is not complicated. Gather a binder and tabs, fill in contacts and medical details first, add copies of key documents, write down your plan, store it somewhere everyone knows, back it up, and review it once a year. Done in small steps, it becomes one of the most practical things you can do for your household.
Disclaimer: This article provides general preparedness information only. It is not professional, legal, medical, or financial advice. Always follow the guidance of your local authorities and emergency services.
One Comment
Comments are closed.